How to learn to paint? How to do daytime makeup step by step
All girls can put on face makeup, but not all do it correctly. Therefore, sometimes there are mask faces, faces glued to the neck, overdried faces and other misunderstandings. How to learn to apply makeup in order to avoid the main mistakes that most girls make? In fact, this process is not so complicated, but as in any business, to become a pro, you need to train.
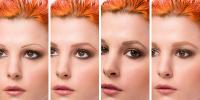
Makeup rules: day and evening
Some girls confuse day and night, or don’t see much of a difference. Most often this applies to evening makeup, which can be seen during the day. Less often, daytime makeup at night. However, daytime makeup at night is less awkward than evening makeup during the day. And so, before we learn how to learn to put on makeup, let’s once and for all determine where daytime makeup ends and nighttime makeup begins.
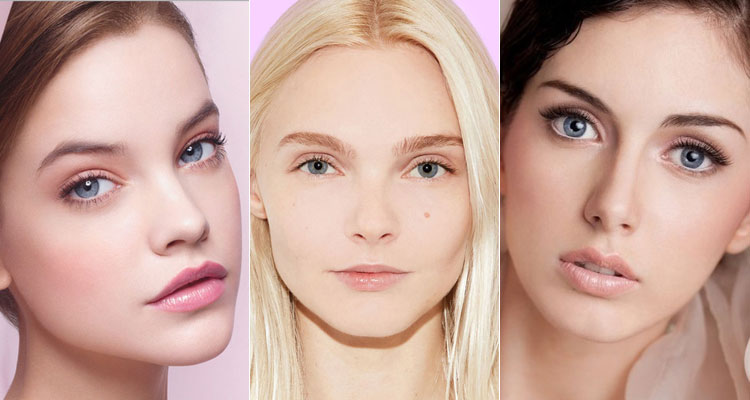
For daytime or natural makeup, light shades of eye shadow, blush, and lipstick are used. Natural makeup is as nude as possible, that is, it looks more like highlighting the contours of the face than full-fledged makeup. Translucent shadows, glosses, blushes are used for contouring and instead of shadows. Daytime makeup is acceptable, or those shades that perfectly match your skin color type. Among them are blue, green, gold, and brown tones. But they should not be saturated, with abundant shimmer. It is best to use matte shadows.
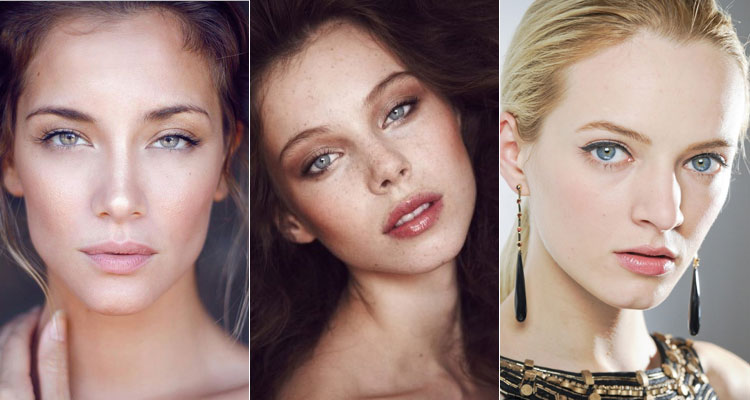
Blush and correctors are welcome in daytime makeup, but they are extremely light and translucent. No facial sculpting is needed for daytime makeup, especially with a tanning effect. The color of the blush should also match, which means that if the girl’s natural blush is closer to peach, then this will be the shade of the blush. Scarlet or red blush is used exclusively for carnival makeup, or should be applied as lightly as possible, almost imperceptibly.
Daytime makeup has not represented itself for a long time, so you can safely draw them. Depending on the shape of the eyes, the arrows can be very small and thin or, on the contrary, thick and wide. Of course, an obvious overkill, which does not correspond to either the shape of the eyes or the occasion, immediately catches the eye. There is no need to compete with your friends to see whose arrows are more visible. Leave such competitions for the night.
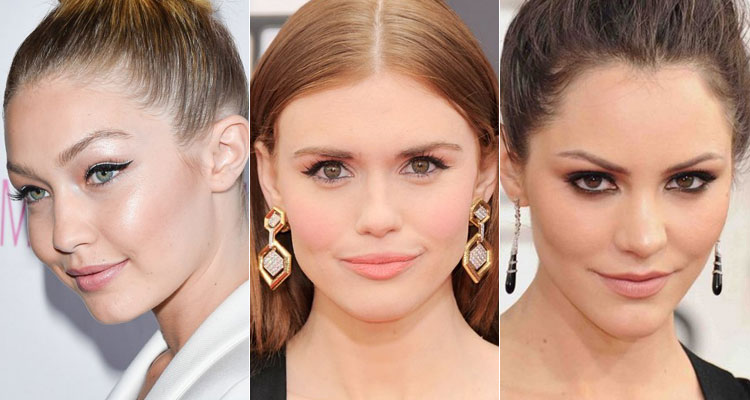
Lipstick for daytime makeup, as mentioned above, should be light. But, they expanded the color boundaries to red. Choosing a red lipstick that will suit and decorate is not always easy. The main thing is not to give up trying if you really like how it looks on other girls and really want to try it on your lips.
Evening makeup includes everything that was not mentioned above. These are bright, rich, dark, shimmering shades of shadows. These are bold eyeliner, smokey eyes, long winged eyeliner and eyeliner of various interesting shapes. These are bright, rich blushes, darker correctors. And also, lipsticks of any color and with any effect.
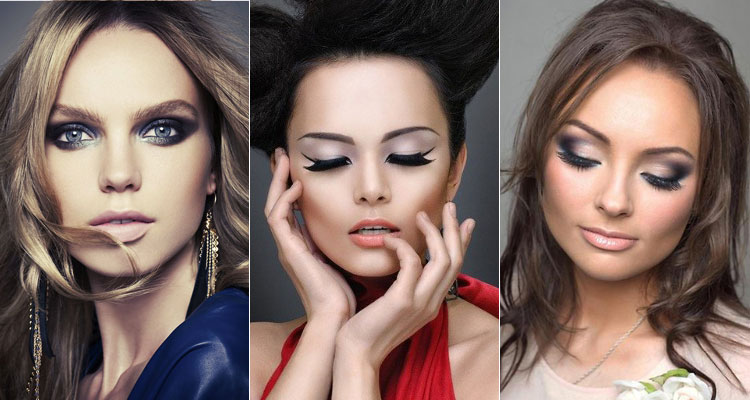
Of course, all of the above does not mean that you need to hide your face under a layer of defiantly bright makeup. Evening makeup can be almost monochromatic, simple, but with correctly placed accents.
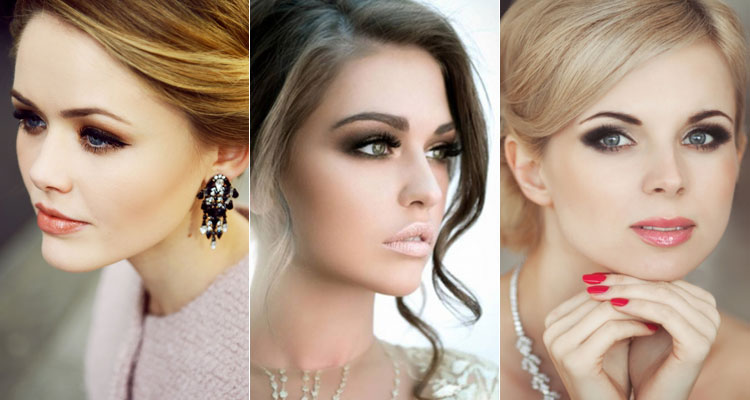
In any case, dark eyes, too active contouring and dark lips remain for the evening, and during the day it is enough to emphasize the natural beauty without hiding it.
How to apply makeup
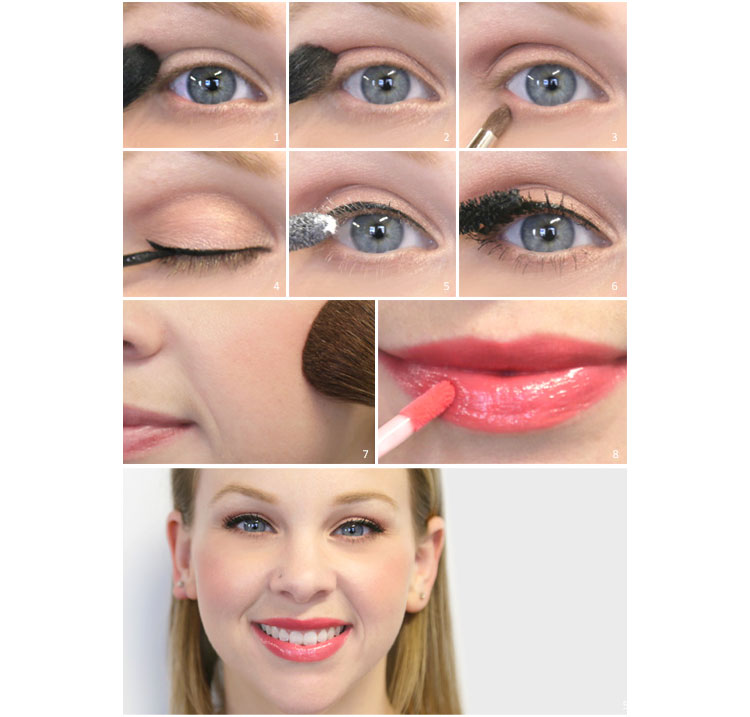
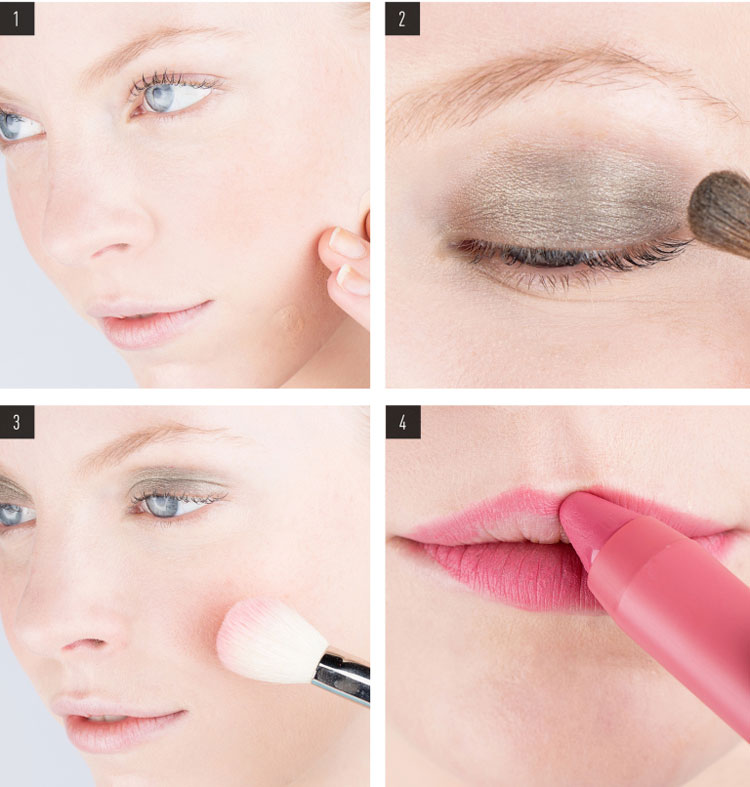
Well, it's time to tell you how to learn how to paint, where to start and how to finish. Let's limit ourselves to daytime makeup using eyeliner and lipstick instead of gloss.
Before applying base or foundation to your face, run your fingertips over it. There should not be any roughness, otherwise foundation and powder will immediately highlight them. To make your face smooth, just steam it, do a scrub or peel, moisturize well and wait 15-20 minutes until the cream is absorbed.
Now you can correct the unevenness. For oily or combination skin, apply a mattifying base to your face first. In addition to the fact that the foundation will fit better on it, it will also help keep the makeup on longer.
Base, correctors, powder
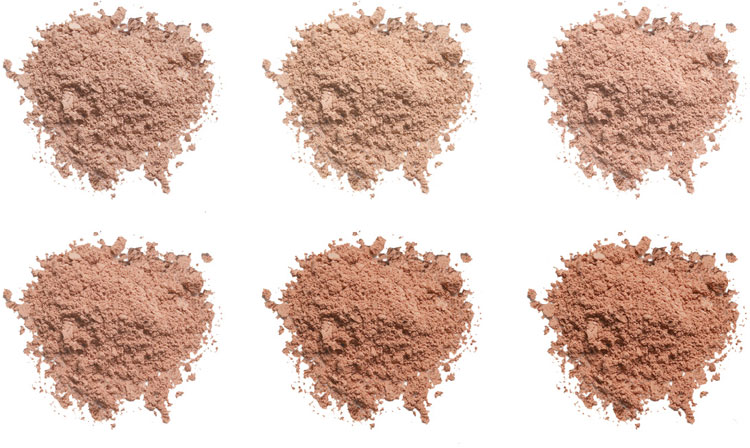
The foundation is applied in the thinnest possible layer, and its color should be close to the natural skin tone, or be translucent and adapt to your shade. For application you can use:
- fingers– under their warmth, the foundation will be applied to the face quite evenly;
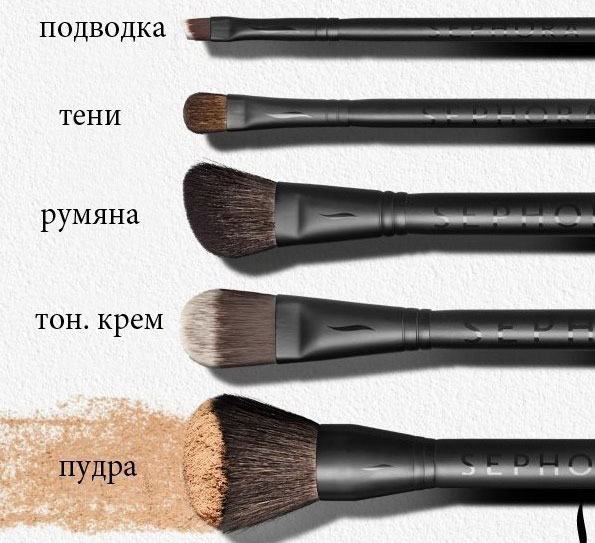
- brush– for foundation they come in different sizes, making it convenient to apply foundation not only to large areas of the skin, such as cheeks, but also to the folds of the nose, between the eyebrows, and under the eyes;
- beauty blender– it will not allow you to overdo it with foundation, applies it to the face in a thin layer, and is easy to use;
- sponge– actually an early ancestor of the beauty blender, but no less convenient, and also does not allow you to turn your face into a mask.
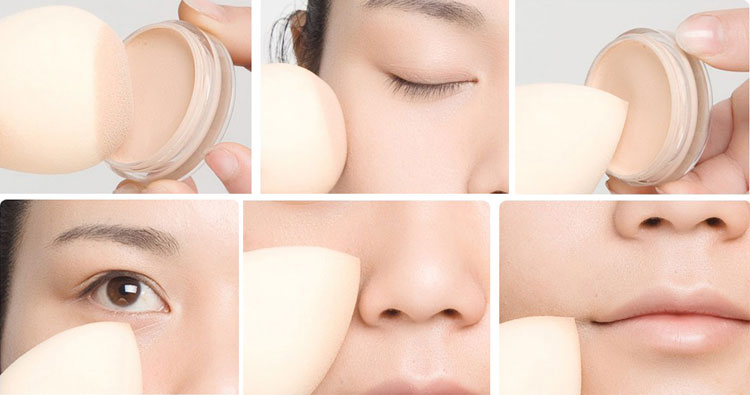
Don't forget that the foundation layer should be thin. In order to dose the application, squeeze the cream onto your finger, covering the pad, and then apply small dots onto your face using point-to-point movements. Once you look like a fly agaric, you can rub the foundation with your fingers, brushes or sponges.
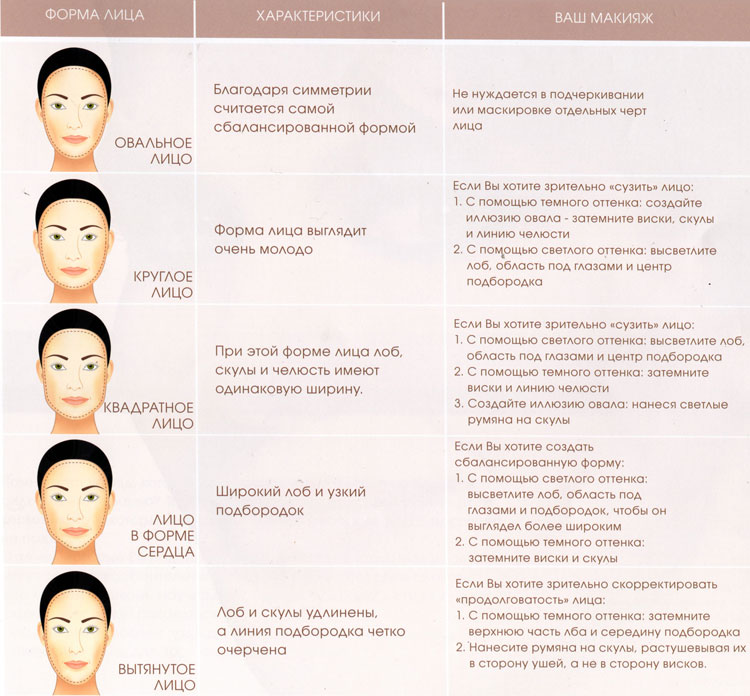
To highlight your cheekbones, you can use a concealer. The shade should be chosen two or three shades darker than your skin tone or foundation. A darker corrector will turn your face into a skull study guide.

The corrector is applied in a light layer under the cheekbones, along the edges of the forehead, near the nose and, in some cases, on the chin or lower cheekbones. It all depends on the specific face shape.
Shading of the corrector is done with fluffy large brushes, which are also used for blush. There should be no clear lines left, just a light shadow.
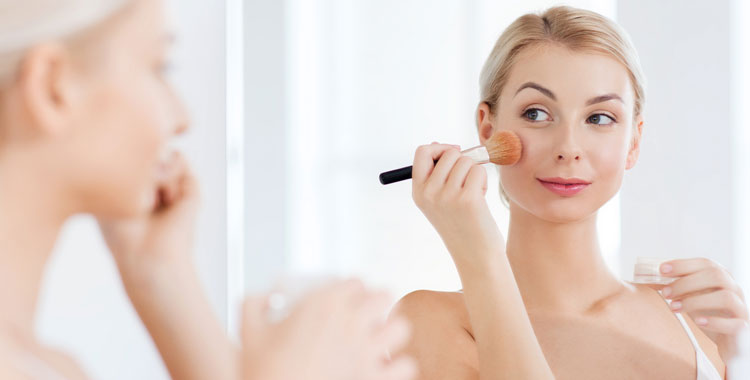
Blush is selected in accordance with the color type and for daytime makeup should be light and translucent. Brightly highlighted cheeks will definitely not beautify, and under a daytime color they can also create a completely undesirable effect or look much brighter.
To apply blush correctly, it is enough to portray an embarrassed smile when the corners of the lips are raised up and the lips themselves are slightly compressed. Rounded cheeks only need to be brushed a couple of times with a blush brush. Do not overdo it.
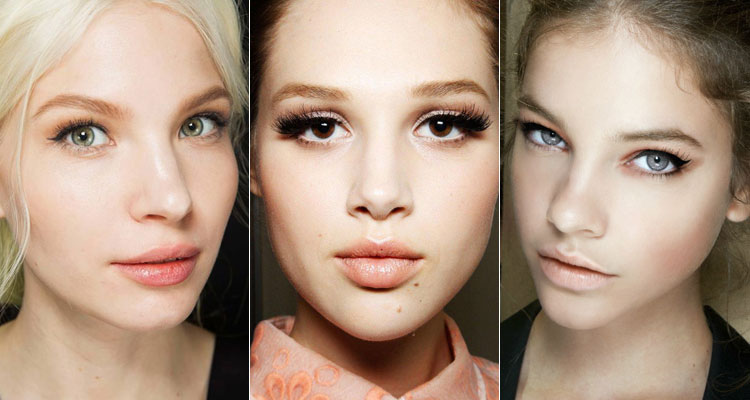
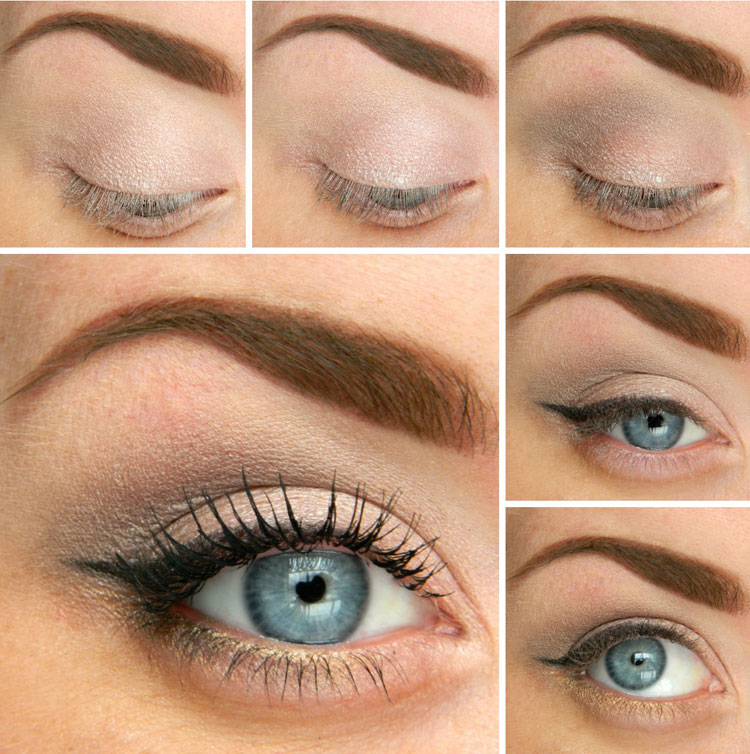
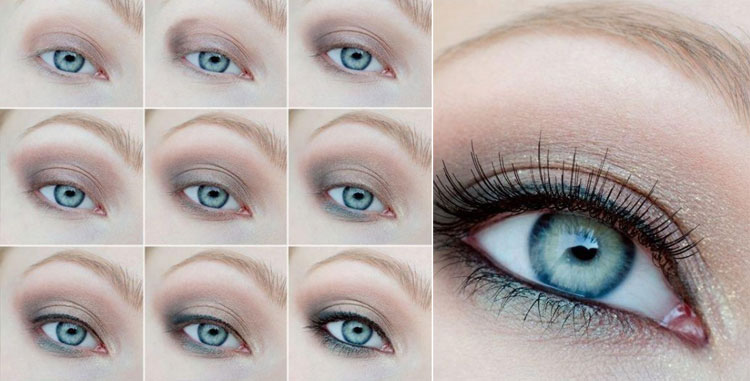
How to paint your eyes
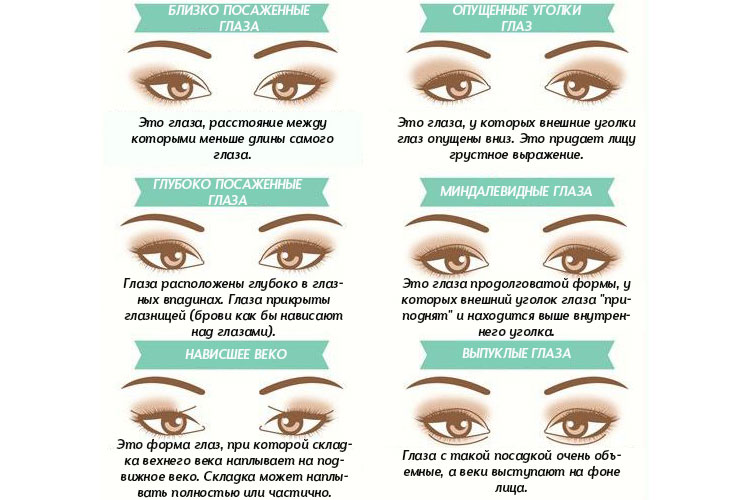
First of all, you should know exactly your eye shape, size, bulge or hollowness. Also, do not forget that if there are bruises or dark circles under the eyes, they need to be disguised with a light corrector.
Big beautiful eyes look great, if nature decided so. But increasing them with arrows or using smokey eyes is not the best solution for daytime makeup. First, ask yourself how many times have you heard compliments about your eyes, while not wearing makeup or only wearing eyelashes. If compliments come often, emphasize the natural beauty of the eyes with natural shades of shadows, thin short arrows, mascara with a suitable brush. But, if you don’t hear such compliments at all, you should not only highlight your eyes more strongly, but also do it differently than usual.
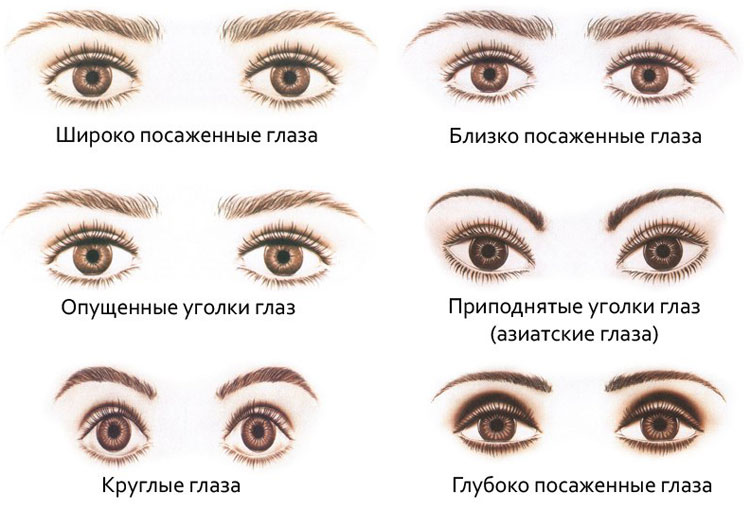
Sometimes girls hide the beauty of their eyes behind abundant discharge or changes in shape. In most cases, these are unjustified maneuvers. Drooping corners of the eyes can be raised using arrows. Protruding eyes can be tinted with dark shades of beige. For sunken eyes, use light shades. Find your eye shape in the video master class on daytime makeup and repeat it on yourself.
The general rules for how to paint your eyes during daytime makeup are as follows:
- If there is no special base for shadows, use a face base. When applying foundation to the upper eyelid, run your fingers along the eyelids to collect any remaining foundation in the crease of the eyelid. Thanks to this, the shadows will not fade in a couple of hours.
- The shade of the shadows can be from light beige to dark beige, golden, peach, with a reddish tint. Other colors are also selected - from light to medium saturated.
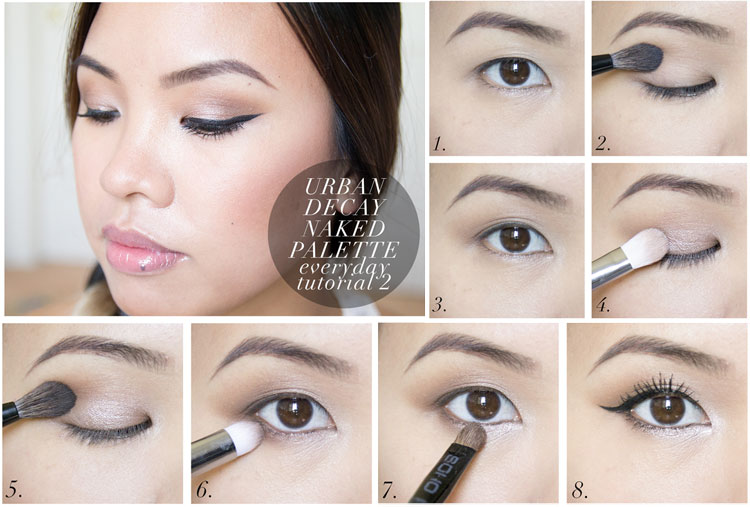
- Paint the moving fold of the upper eyelid with darker shadows. The look will immediately become more expressive and deep.
- Apply a thin layer of blush or light shadow under the eyebrows. Thus, the eyes open, become fresher and clearer.
- Apply 2 shades of eyeshadow below the eyelid to highlight the inner corner of the eye and darken the outer one. If you are applying only one dark shade, then blend it halfway up the eye to the outer corner, while leaving the inner corner untouched.
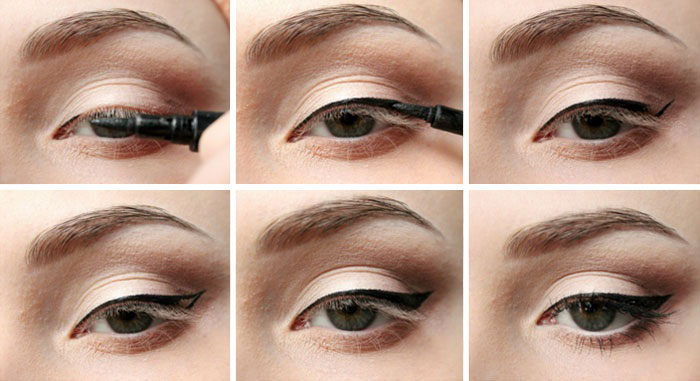
- Arrows can be applied to both the upper and lower eyelids, but in the case of daytime makeup, it is better to limit yourself to only the upper eyelid. In order to draw a neat little arrow, you can use many devices, from a stencil to a tablespoon. Don't be afraid to use brown, gold or other light eyeliners, this will only add naturalness to your makeup.

- Brows. You can use a dark brown soft pencil, dark shadows (if you are dark, then match your hair color), and special eyebrow mascara. Black eyebrows suit blondes, but without fanaticism. They look especially impressive with slightly grown dark roots. Brunettes should take a black pencil or eye shadow. And remember: do not draw the beginning of the eyebrow at the very bridge of the nose; do not extend the tip of the eyebrow to the outer corner of the eye; if you overdo it, use cotton swabs and remove the excess.
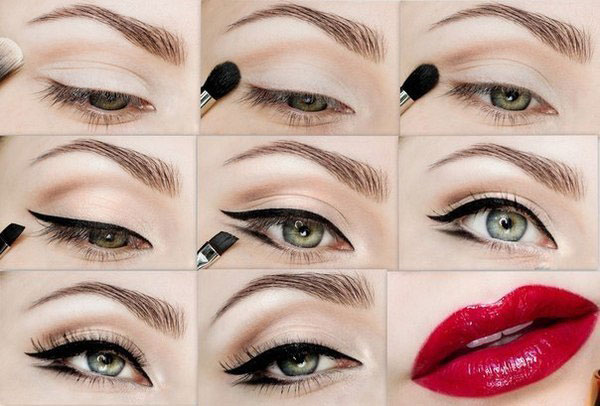
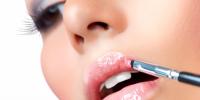
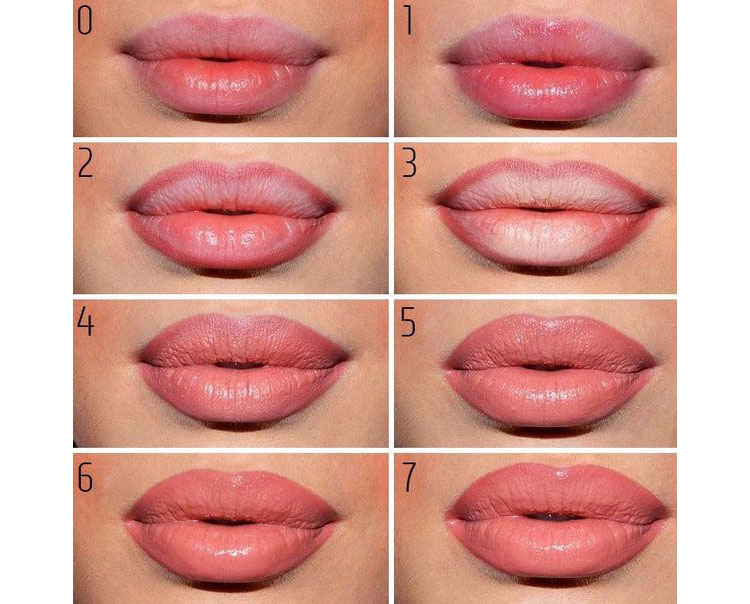
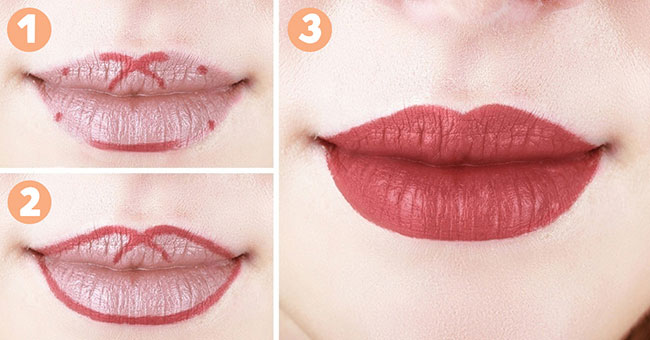
How to put on lipstick
If glitter is used for daytime makeup, then eyeliner is not necessary. If you are using lipstick, it is better to highlight the outline with a pencil that is a shade lighter or the same color as the lipstick. But you shouldn't use a darker shade of pencil. This is only acceptable for evening makeup with a town hall.
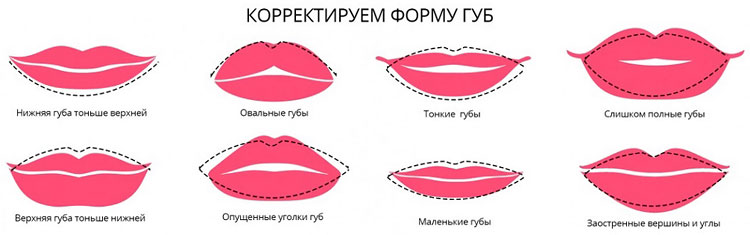
Do not extend the eyeliner far beyond the contour of your own lips, otherwise it will be too noticeable. Do not contour inside the lips, as this can make them appear smaller. It is ideal to outline the lips, protruding 1-2 millimeters above the natural contour.
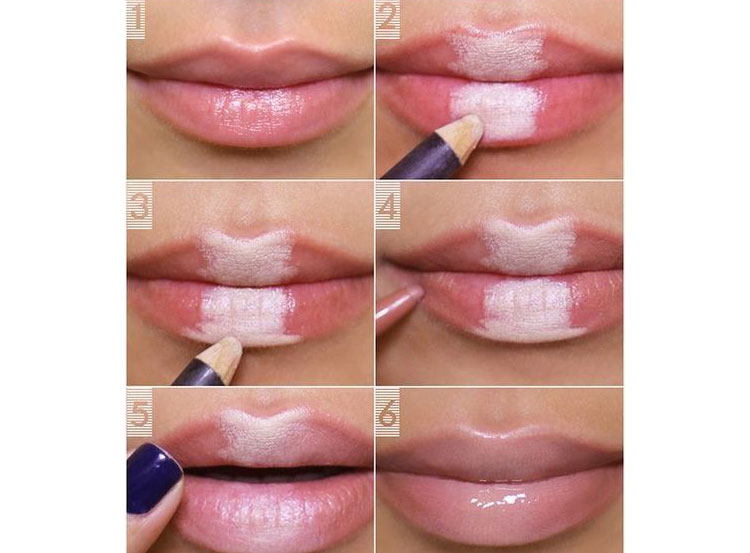
To make your lips shine, you can apply a transparent gloss over the lipstick. But this is a very short-lived effect and will have to be corrected during the day.
To ensure that the lipstick retains its color longer and remains on the lips, it is recommended that after application, apply a napkin to your mouth and lightly powder your lips through it.

How to learn to apply makeup from video
The easiest way to learn how to apply makeup is to open a video with the makeup you like and follow the advice of a video blogger or makeup artist. If in a video tutorial they use a lot of brushes, some intricate foundations, shadows, correctors, you don’t need to be upset that you won’t be able to repeat this makeup at home. In fact, the use of tools such as acids or sponges depends on personal convenience. If it’s convenient to do everything with your fingers, do so.
Another thing is eyeshadow brushes. It’s difficult to paint anything worthwhile with standard brushes that go with any palette. But brushes of different sizes for the eyelids can transform the application of makeup, making it more interesting and professional. Therefore, it is worth considering purchasing a couple or more eyeshadow brushes.
If the suitable colors that were indicated in the video are not currently in your cosmetic bag, write down that you liked them, so that when you go to the store you don’t have to rack your brain for a long time about which palette to take. Use available colors that match the shade of the video tutorial as closely as possible, or that also combine well.
If any point in the video lesson is not relevant to you, just skip this step. Girls under 25 years old can generally ignore correction of the skin around the eyes when the model from the video is an adult woman. Likewise, women over 30 should understand that they cannot skip any steps in makeup if the young model from the video does not mention or show them.
Watch different videos, mix techniques, add your own, be beautiful! And for everyone who still doesn’t believe in the power of makeup, be sure to watch the comic videos below on how to do and not do makeup.