How to glue a ceiling plinth in the corners
When carrying out repairs, there are no secondary works. In particular, this applies to finishing work, which is carried out at the final stage of repair. Any shortcomings in the work can spoil the whole overall look of the repair, because the finishing elements are in plain sight and must be done perfectly.
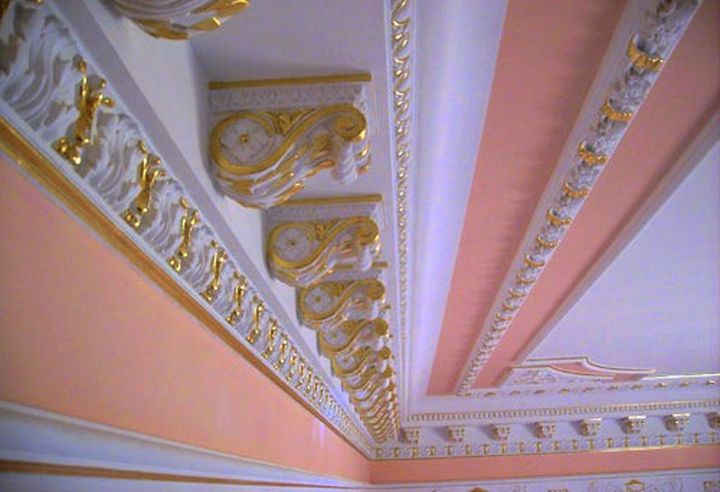
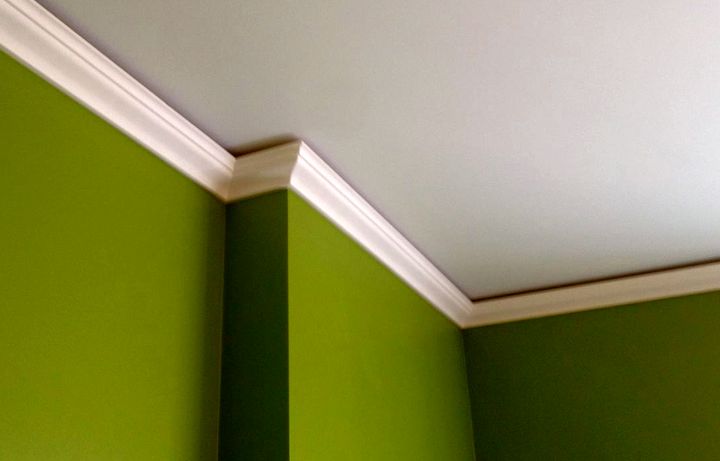
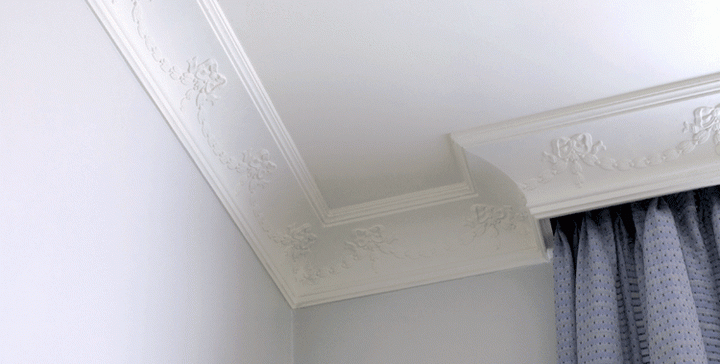
An important stage in the decoration of the ceiling is the sticker of the ceiling plinth, called the frieze or fillet. This element creates a smooth transition between wall and ceiling, logically completing the structure.
Under the ceiling plinth, you can hide minor irregularities and flaws, but its main purpose is to decorate the room, harmoniously fitting into the overall interior.
Main stages
Working with a ceiling plinth is not laborious and difficult even for beginners. But there are several main questions that will arise in the process of work:
- what material should a high-quality ceiling plinth be made of?
- how to calculate the number of planks when buying?
- what width of the fillet will organically fit into the design of the room?
- how to cut the ceiling plinth in the corners?
- how to securely fasten baguettes?
- how to glue the ceiling plinth in the corners?
These questions need to be answered correctly in order to achieve the perfect ceiling finish that adorns the entire room.
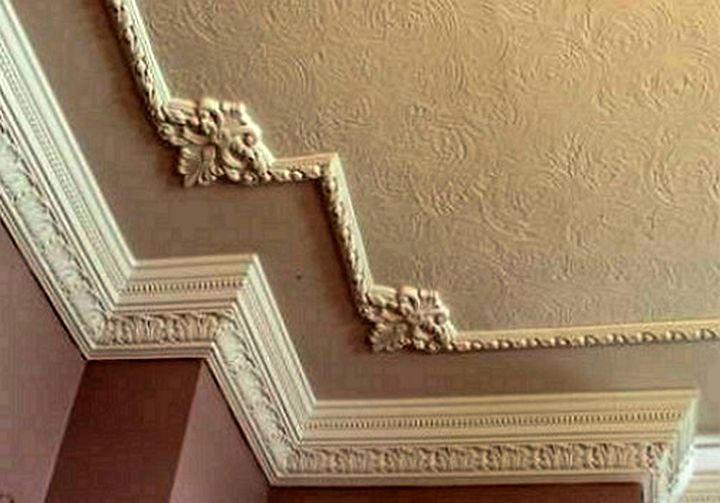
The most careful and careful consideration should be given to the design of the corners. With inaccurate work, cracks or mismatches may form at the joints of the fillets, and then the appearance of the entire ceiling will be spoiled.
Material of manufacture and the required number of baguettes
The most commonly used ceiling plinth is made of polystyrene, expanded polystyrene and polyurethane. Such fillets are light, moisture resistant, flexible and do not respond to temperature changes. They have a variety of widths and a large selection of patterns, reliefs and patterns, their use allows you to create any decorative effect. The ceiling plinth made of these materials is easy to paint, thanks to which a variety of artistic decor can be created.
The profile of polystyrene and expanded polystyrene is unstable to mechanical stress, therefore, during installation, it requires additional care. Polyurethane fillets are characterized by increased strength and the ability to maintain clear embossed shapes.
You can use a PVC ceiling plinth, but it should be borne in mind that this material cannot be painted, and under the influence of temperature changes it can be deformed. To create a specific finish, a ceiling plinth made of gypsum, wood or aluminum is sometimes used, but such fillets have low ductility, high weight and characteristic installation features.
Before buying, you need to calculate the amount of material. To do this, measure the perimeter of the room - this value is equal to the total length of the ceiling plinth. Baguettes are produced in lengths of 1.2, 1.5 and 2 meters. By dividing the perimeter of the room by the length of the acquired fillets, their number is calculated. In order to have fewer joints, it is better to purchase the longest products.
When choosing the width of the fillet, you should consider the height of the ceiling in the room.
In high rooms, a wide ceiling plinth looks organically, visually reducing the height of the ceiling. If the ceiling height is small, then it is better to choose narrow baguettes.
Preparation for work
In the process of work, you will need a number of tools, they must be prepared in advance:
- tape measure to determine the amount of material needed;
- quick-drying glue or putty, for fixing baguettes to the wall and ceiling;
- spatula and mixing container, if the fillets are fixed with putty;
- dry clean cloth to remove excess glue or putty;
- a miter box, store-bought or home-made, will help solve the question of how to cut the ceiling plinth in the corners correctly;
- sharp construction knife or file;
- painting twine.
Correctly glue the ceiling plinth before pasting the wallpaper, on the plastered wall. And only after that glue the wallpaper, starting from the bottom edge of the frieze. Fixed fillets will stick more firmly to the wall surface, and not to the wallpaper. If there is a need to change the wallpaper, then this can be done without changing the ceiling plinth. If the baguettes are fixed on the wallpaper, then along with re-gluing the wallpaper, the ceiling plinth will also have to be redone.
As an adhesive base, it is better to choose a quick-drying adhesive, acrylic or silicone-based, or building putty. Glue is used when sticking fillets on wallpaper, putty, if the frieze is fixed to the wall. When working with these materials, you do not have to hold the baguette for a long time, pressing it against the ceiling, waiting for the adhesive base to set. The use of putty will allow you to immediately cover up the irregularities of the wall and the resulting cracks.
To facilitate further work, with the help of a masking cord, it is necessary to draw a control line.
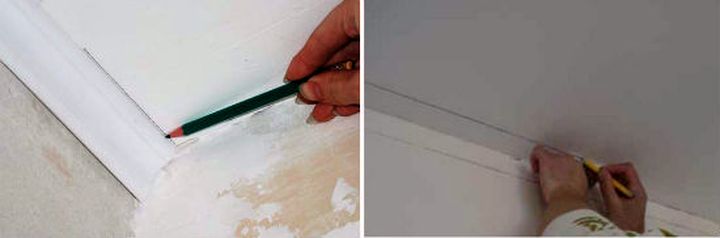
Measuring the width of the fillet on the ceiling and wall, a straight line is beaten off with a cord. In the future, guided by it, it is much easier to evenly stick the ceiling plinth.
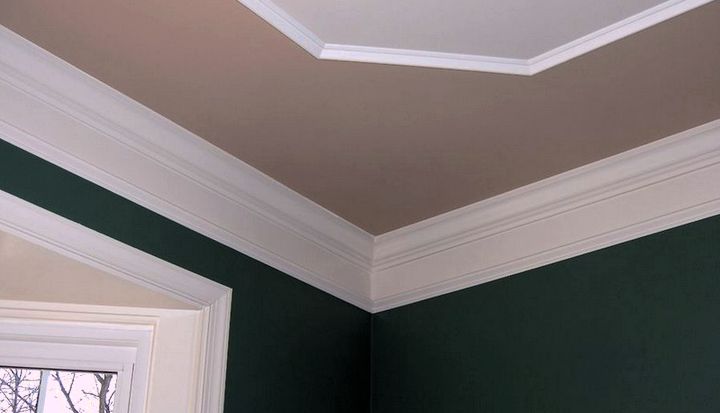
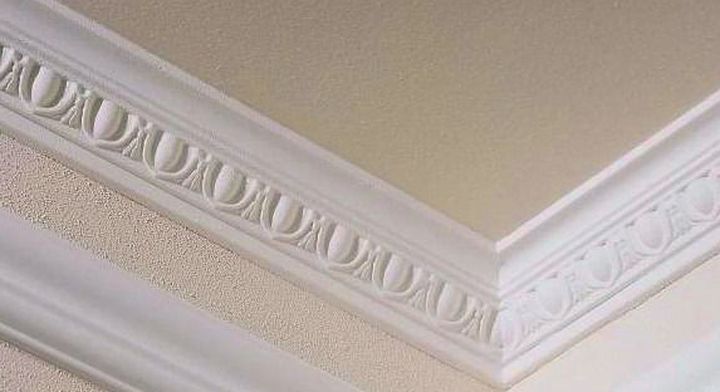
Corners of ceiling moldings
Glue fillets, it is necessary starting from one of the corners. To do this, many types of skirting boards are sold with ready-made internal and external corners. Such elements are convenient to use on friezes with a complex pattern that require careful adjustment. If a cornerless ceiling plinth is used, how to make a corner and dock it beautifully will help the use of a miter box and a file.
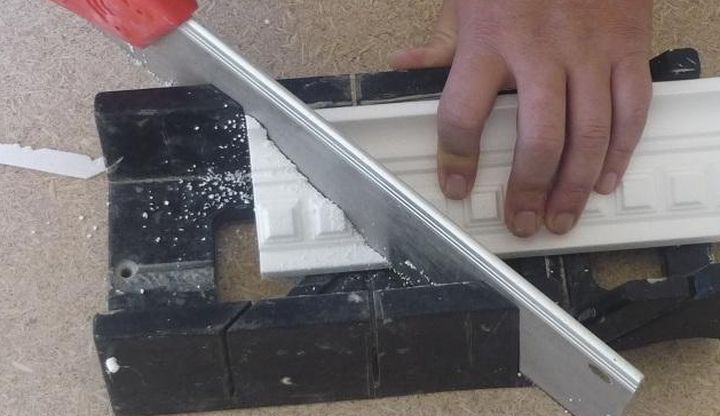
The main question, so that the baguette becomes an ornament and its appearance is not spoiled, is how to cut off the corner of the ceiling plinth? For regular right angles, it is necessary to cut the fillets at an angle of 45 degrees, towards each other, so that when they are folded they form a right angle.
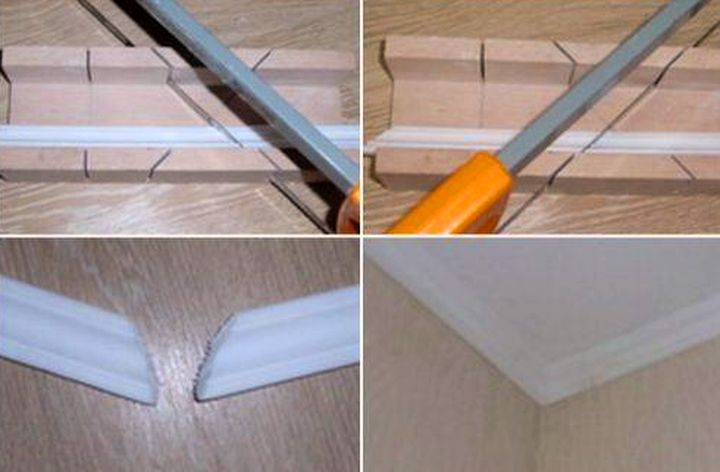
In order to correctly determine the slope of the cut, it is necessary to attach the fillet to the ceiling and then it will immediately become clear how to cut the corners so that the ceiling plinth lies correctly.
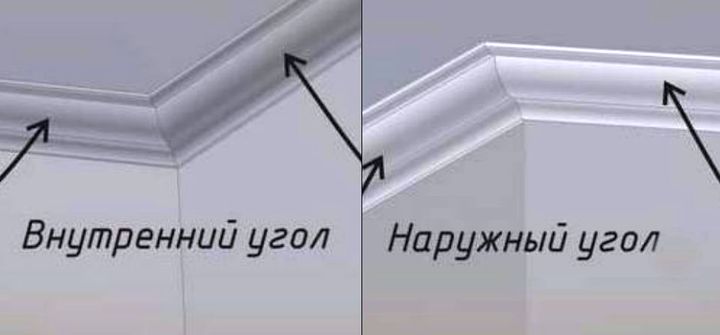
Baguettes are cut in mirror image. For an inside corner, the top edge of the frieze should be shorter than the bottom edge, and vice versa for an outside corner.
The ceiling plinth located on the right side must be cut on the left side, and vice versa, the frieze located on the left side must be cut on the right side. Cutting the plinth must be done carefully, moving the knife in one direction so that chips and roughness do not form. Correctly and accurately cutting corners is the most critical part of the work, it depends on how beautiful the ceiling plinth will look.
The miter box can be made with your own hands, for this you need a solid base. Two parallel lines are drawn on it, at a distance of 10 cm. A perpendicular is drawn between them, which will correspond to a cut of 90 degrees. On both parallel lines, from the perpendicular, 5 cm are measured in two directions and two intersecting lines are drawn obliquely between the far marks. They will correspond to 45 degree angles, which are optimal for cutting the corners of the ceiling plinth.
Using this device is easy. The baguette is laid along parallel lines and an angle is cut out according to the intended landmarks, in accordance with the required direction.
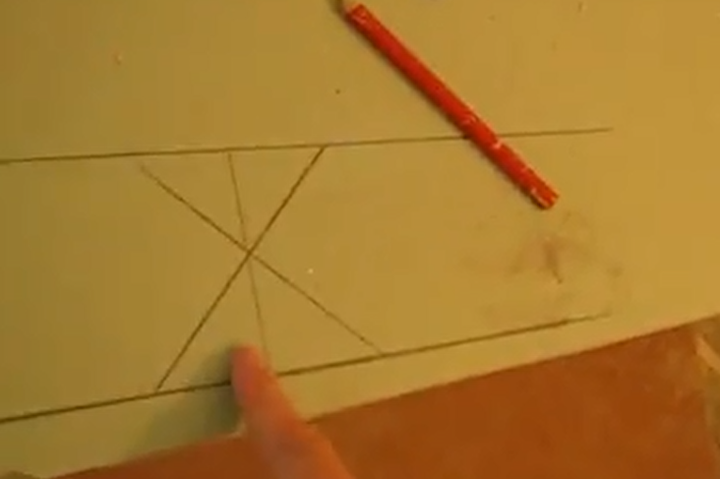
For complex non-right angles, a standard miter box will not work. It is more convenient to make markings, the future location of baguettes on the ceiling and wall. After attaching the ceiling panels, mark the intersections directly on them.
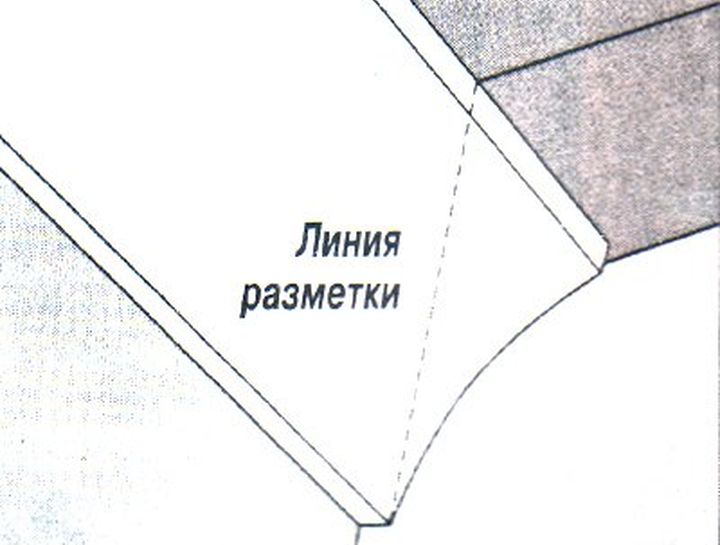
Pruning must be done, focusing on the points of their future intersection.
Fixing the ceiling plinth
It remains to solve the question of how to glue the ceiling plinth in the corners and along the entire wall in order to get a harmonious and neat design. Along the entire length of the baguette, on the reverse side, it is necessary to apply a thick layer of adhesive. The fillet attachment points on the wall and ceiling can be pre-moistened with a primer or water, this will ensure faster and easier installation.
Starting from the corner, in accordance with the markings, firmly press the ceiling plinth along the entire length to the wall and ceiling.
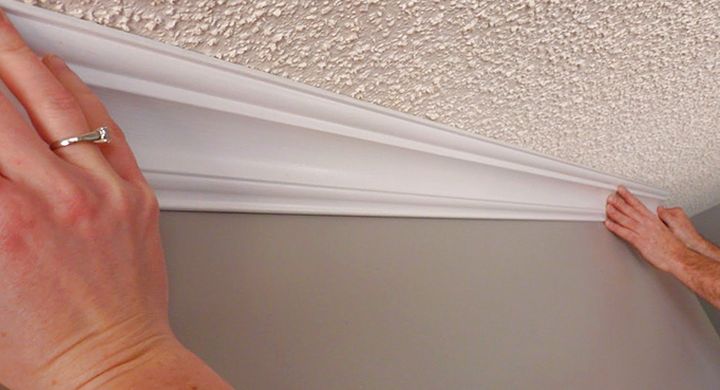
It is necessary to hold in this position for several seconds, this is enough for fairly light baguettes to adhere to the surface of the wall and ceiling. Having fixed and aligned the corners, straight sections are added, carefully connecting them at the joints.
Excess glue or putty should be removed immediately using a spatula or cloth. Places of seams must be carefully and tightly docked, then coat all gaps and cracks with putty.
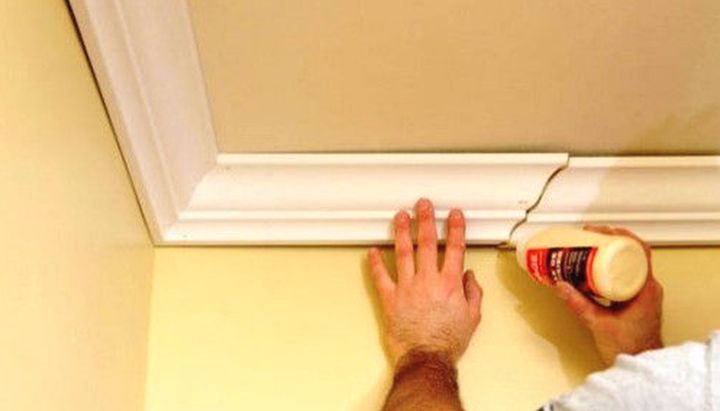
After painting, the joints will be invisible, and the baguette will look complete and neat.